How to Withdraw Crypto Before an Exchange Shutting Down? A Step-by-Step Guide to Safely Transferring Your Assets


In August 2026, several major crypto exchanges are shutting down or winding down operations. AscendEX has already suspended most services and moved withdrawals to manual review, BitMEX is on track to close on September 23, and BitMart is carrying out a phased exit. As a result, many users are asking the same question: How can I safely move my crypto before an exchange shuts down?
Knowing how to Withdraw Crypto Before an Exchange Shutting Down is essential. Waiting until the last minute can lead to delayed withdrawals, manual compliance checks, network selection mistakes, or even stuck funds. To Withdraw Crypto safely, it’s best to follow a clear plan—close open positions, consolidate your assets, test with a small transfer, and keep copies of your transaction records before the platform goes offline.
Key Takeaways
- Pre-Withdrawal Account Audit: Before initiating transfers, cancel all open orders, manually close leverage/futures positions, unbond Earn and Staking products, and sweep all balances into your Spot Wallet.
- Follow On-Chain Transfer Rules: Double-check blockchain network protocols (e.g., TRC-20) and Destination Tags/Memos, and execute a small test transfer before moving full account balances.
- Managing Problematic Assets: Consolidate small dust balances into liquid assets like USDT, withdraw unlisted altcoins to self-custody Web3 wallets, and use chain-swapping strategies during network outages.
- Archive Compliance Records: Immediately export CSV trading logs and withdrawal TxIDs upon clearing your account to satisfy tax reporting and future Source of Funds (SOF) checks.
- Migrate to a Long-Standing Platform: Once withdrawn, transfer your active trading capital to an established exchange like BTCC, backed by a 15-year clean security record and 100% Proof of Reserves.
How can Traders safely transfer their assets before the exchanges shut down?
If your funds are still on the platform, the most important thing right now is to familiarize yourself with the correct process for “Withdrawing Crypto Before an Exchange Shuts Down” as soon as possible, rather than waiting until the last few days to rush through the process.
Many users believe that simply clicking the “Withdraw Crypto” button and pasting in their address is all it takes. But in reality, once an exchange enters its shutdown phase, the situation often becomes much more complicated.
For example:
- Insufficient balance in the hot wallet, requiring you to wait in a withdrawal queue;
- Large withdrawals triggering risk control reviews and requiring manual approval;
- Selecting the wrong blockchain network, resulting in permanent loss of assets;
- Forgetting to fill in the Memo or Tag, causing funds to be delayed;
- A surge in withdrawal requests causing node congestion and significantly extending arrival times.
Therefore, developing a comprehensive asset transfer plan well in advance of the exchange’s official shutdown is more important than blindly rushing to meet a deadline.
A well-structured asset migration process typically includes:
- Closing all positions and pending orders
- Unlocking assets tied up in wealth management products, staking, etc.
- Consolidating balances across multiple wallet accounts
- Conducting small test transfers
- Saving all transaction records and TxIDs
- Finally, completing the withdrawal of all assets
Following these steps can significantly reduce the risk of failed withdrawals, frozen assets, or lost funds.
Essential Checks Before Withdrawal: Clear Your Account First, Then Begin the Transfer
A common mistake many users make is entering their withdrawal address immediately after opening the withdrawal page.
In fact, during an exchange outage, your top priority should be to resolve all unresolved assets within your account.
If your account still contains pending orders, futures positions, investment products, or sub-account balances, these will affect subsequent withdrawals and may even cause the system to reject your request outright.
We recommend checking each item one by one following the steps below.
Step 1: Cancel All Pending Orders and Actively Close Positions
First, go to the Open Orders page for both Spot and Futures trading.
Cancel all pending orders, including:
Limit Orders
Take Profit Orders
Stop Loss Orders
Conditional Orders
These orders typically tie up margin or freeze some assets. Only after cancellation can funds become withdrawable.
Next, check if there are still any open positions.
Whether long or short, it is recommended to actively close positions using market or limit orders, rather than waiting for the exchange to automatically liquidate.
The reason is simple.
As exchanges close, market liquidity typically decreases rapidly, and order book depth becomes increasingly shallow. If you wait for the platform to automatically reduce positions (ADL) or force liquidation, not only may the execution price be far lower than expected, but you may also incur additional slippage and fees, resulting in unnecessary losses.
Step 2: Early Redemption of Investments and Staking Assets
Besides your trading account, you also need to check if any assets are still held in Earn, Staking, or other yield-generating products.
If it’s Flexible Earn, the funds will usually be returned to your spot account within seconds after clicking Redeem.
If it’s Fixed Staking, you need to pay close attention to the maturity date.
If the product’s maturity date is later than the exchange’s official closing date, it’s not recommended to wait for it to mature naturally. Instead, contact customer service as soon as possible to apply for early unbonding.
Note that PoS public chains like Ethereum and Cosmos have an unbonding period of approximately 7-21 days.
The later you apply, the more likely your assets are to remain in the exchange system and ultimately be unable to be withdrawn due to platform closure.
Therefore, the earlier you handle this step, the safer it is.
Step 3: Consolidate Funds from All Sub-Accounts
Many exchanges disperse funds across different accounts, such as:
- Spot Wallet (Spot Trading Account)
- Futures Wallet (Futures Account)
- Margin Wallet (Margin Trading Account)
- Earn Account (Investment Account)
- Bonus Wallet (Rewards Account)
Without a unified organization, it’s easy to miss some assets.
It’s recommended to go to the Asset Overview page, uncheck “Hide Small Balances,” and confirm that all cryptocurrencies are displayed.
Then, use the platform’s Transfer function to transfer all balances into the Spot Wallet.
This is the only fund exit point supported by most exchanges for on-chain withdrawals.
Completing the fund consolidation in advance will make the subsequent withdrawal process smoother.
Step-by-Step Guide: How to Safely Withdraw Cryptocurrency Before an Exchange Shutting Down
Once all your assets have been transferred to your Spot Wallet, you can officially begin the withdrawal process. However, when an exchange is entering its shutdown phase, speed isn’t the most important factor—accuracy is key. Many users don’t lose their assets because the platform ceases operations, but rather due to operational errors during the final withdrawal, which can result in funds taking a long time to arrive or even being lost permanently.
If you’re preparing to withdraw cryptocurrency before an exchange shuts down, we recommend following the standard procedure below. This will effectively reduce the risk of human error and ensure a smoother asset transfer process.
Standard Withdrawal Procedure:
Consolidate funds into the Spot Wallet → Verify the deposit network and Memo/Tag → Perform a small test transfer → Withdraw all assets only after confirming the funds have been received
Step 1: Confirm that the sender and recipient are using the same blockchain network
Among all withdrawal errors, selecting the wrong blockchain network is one of the most common and most serious issues.
Take USDT as an example. Most exchanges support multiple networks simultaneously, such as TRC-20, ERC-20, BEP-20, Arbitrum, Polygon, Solana, and others. Although they are all USDT, they belong to different blockchain networks and are not interoperable with one another.
Therefore, before initiating a “Withdraw Crypto” transaction, you must ensure that both the sending and receiving platforms have selected the same network.
For example:
✅ AscendEX: USDT (TRC-20) ➡️ ✅ BTCC: USDT (TRC-20)
This is the correct network pairing.
Conversely, if you send USDT from the Arbitrum network to a deposit address on the Solana network, the funds will typically end up directly in the wrong on-chain address and, in the vast majority of cases, cannot be recovered.
To avoid this situation, we recommend not relying solely on the token name. Before each withdrawal, double-check the following three pieces of information:
- The token is correct.
- The blockchain network matches on both platforms.
- The destination wallet address has been copied correctly.
Spending an extra minute verifying these details can save you from a permanent loss.
Step 2: Correctly Enter the Memo or Destination Tag
Some public blockchains use shared deposit addresses, so in addition to the wallet address, you’ll need to enter a unique identifier.
If you’re withdrawing tokens such as XRP, EOS, XLM, ATOM, or TIA, the receiving platform will typically provide both:
- A deposit address
- A Destination Tag or Memo
Both pieces of information are essential.
When making a withdrawal, you should copy the Tag or Memo generated by the platform directly and paste it in its entirety into the corresponding field. Do not enter it manually, and do not omit any numbers or characters.
Many users assume that as long as the address is correct, there will be no issues. In reality, if the Memo or Tag is entered incorrectly, even if the blockchain has confirmed the transaction as successful, the funds may end up in the exchange’s public wallet rather than being automatically credited to your account.
Although some platforms can assist with manual recovery, the review process is usually quite complex, and the wait time can be as long as several days or even longer. Therefore, the best approach is still to double-check everything carefully before submitting.
|
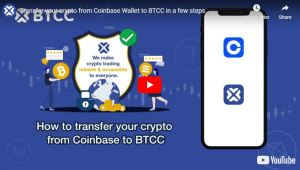
Generate your BTCC deposit wallet in seconds and ensure a smooth migration route.
|
Step 3: Always Send a Small Test Transfer First
No matter how much you’re transferring, avoid sending your entire balance in one transaction.
Instead, start with a small test withdrawal.
For example, send 10–20 USDT, or the minimum withdrawal amount allowed by the exchange. Wait 5 to 15 minutes and confirm that the funds arrive successfully in your destination account, such as BTCC.
Once the test transaction has been credited, return to the source exchange and withdraw the remaining balance.
This approach may require an additional network fee, but that small cost is insignificant compared with the risk of losing your entire balance because of an incorrect address, network, or Memo.
When you need to Withdraw Crypto Before an Exchange Shutting Down, a test transfer is one of the safest precautions you can take.
Step 4: Submit the Full Withdrawal and Track the Transaction with the TxID
After your test transfer has been confirmed, you can submit the withdrawal for the rest of your assets.
Before clicking Confirm, check the following one more time:
- The final amount after network fees (gas fees).
- The wallet address, blockchain network, and Memo/Tag.
- Completion of all required security verification steps, including 2FA, email verification, and SMS authentication.
Once the withdrawal request is processed, the exchange will generate a unique TxID (Transaction Hash).
Keep this transaction ID in a safe place.
You can paste the TxID into a blockchain explorer such as Tronscan or Etherscan to monitor the transaction in real time.
Using the TxID, you can verify:
- Whether the transaction has been broadcast to the blockchain.
- The current number of block confirmations.
- Whether the transaction has been fully confirmed.
- Whether the funds have reached the destination address.
If your withdrawal is delayed or you need to contact customer support, the TxID is the most important proof of the transaction. Saving it together with your withdrawal records will make troubleshooting and future verification much easier.
|
Pair self-custody peace of mind with ultra-fast trading execution on BTCC. Protect your long-term assets in self-custody Web3 wallets and move your active trading capital to a platform operating safely since 2011.
|
FAQs
What happens if my Staking or Earn assets cannot be unbonded before the exchange permanently shuts down?
If fixed staking or lockup periods extend past the exchange's decommissioning date, contact platform customer support immediately to request an "Emergency Early Unbonding." Most proof-of-stake protocols enforce a 7-to-21-day unbonding period; submitting your request early is essential to prevent funds from being frozen on a decommissioned platform.
How can I safely transfer an altcoin if my target exchange (like BTCC) doesn't support that token?
Never send unsupported tokens to a deposit address for a different coin. Instead, withdraw the altcoin directly to a Web3 self-custody wallet (e.g., MetaMask, Trust Wallet, or Phantom). Once received, use a decentralized exchange (DEX) like Uniswap or Raydium to swap the token into USDT or ETH, then deposit those mainstream assets into your BTCC account.
Why did my small test transfer arrive quickly, but my large full withdrawal is now marked as "Pending"?
While small test transfers usually trigger automated payout engines, large-volume withdrawals frequently breach security thresholds, routing the transaction to compliance teams for manual review. Check your registered email for identity verification (KYC) or Source of Funds (SOF) requests, and avoid cancelling and resubmitting the order, as this resets your queue position.
What account records must I download before the exchange web servers go offline?
You should export all-time CSV or Excel statements covering spot trade histories, futures real-world PnL reports, deposit/withdrawal histories, and transaction hashes (TxIDs). These documents are essential for calculating capital gains/losses for local tax compliance and serving as Source of Funds (SOF) proof when moving capital to new exchanges.
Please be aware that all investments involve risk, including the potential loss of part or all of your invested capital. Past performance is not indicative of future results. You should ensure that you fully understand the risks involved and consider seeking independent professional advice suited to your individual circumstances before making any decision.
For any inquiries or feedback regarding this article, please contact us at: [email protected]